80% Arms Easy Jig Gen 2 Review
For anyone building their own AR10 or AR15 from an 80% lower, a good jig is an absolute must. I’ve tried several, but I have a new favorite.
In this 80% Arms Easy Jig Gen 2 review, I completed several different AR15 lowers from different manufacturers and made of different materials. And, even though I tried, I couldn’t find any significant fault with the system.
If you have an AR10 or AR15 lower waiting for completion this review will be of interest to you. So, let’s not waste any time and jump right in.
The Easy Jig Gen2
Making an AR15 is one of the most popular homemade firearm builds today. Even so, a lot of people are hesitant because of the perceived difficulty in accomplishing the task.
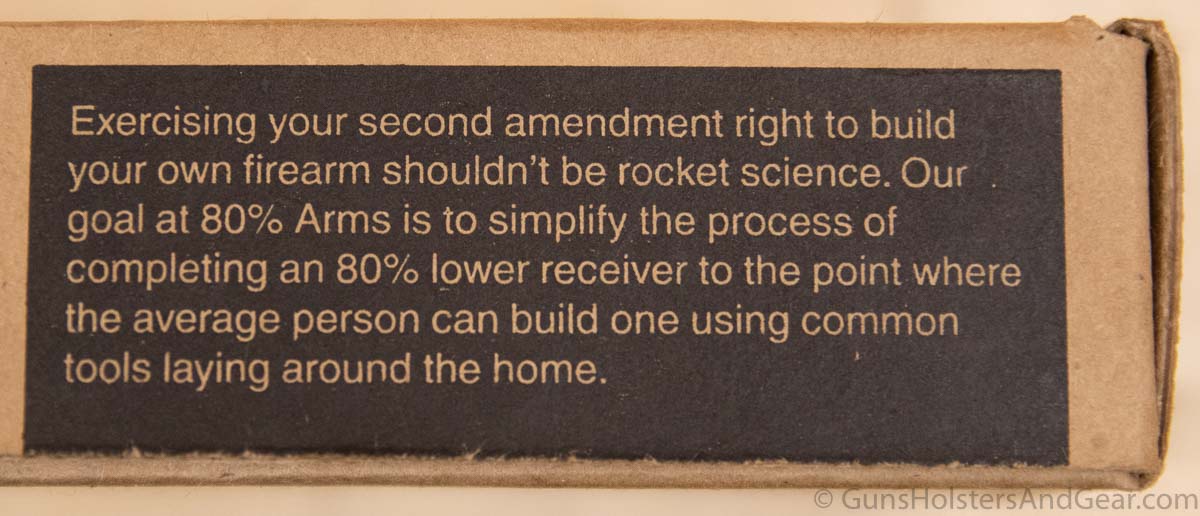
Good news: I’ve had no machinist training, and I can build a complete AR15 from an incomplete hunk of metal. Trust me – if I can do it, there is a very good chance you can as well.
To turn that paperweight into a firearm receiver, you will need a jig like the 80% ArmsEasy Jig Gen 2. A jig is simply a durable template that holds the unfinished part and guides your machine work to make a functional part. A high-quality jig will allow you to repeat the build process hundreds of times.
Compatibility
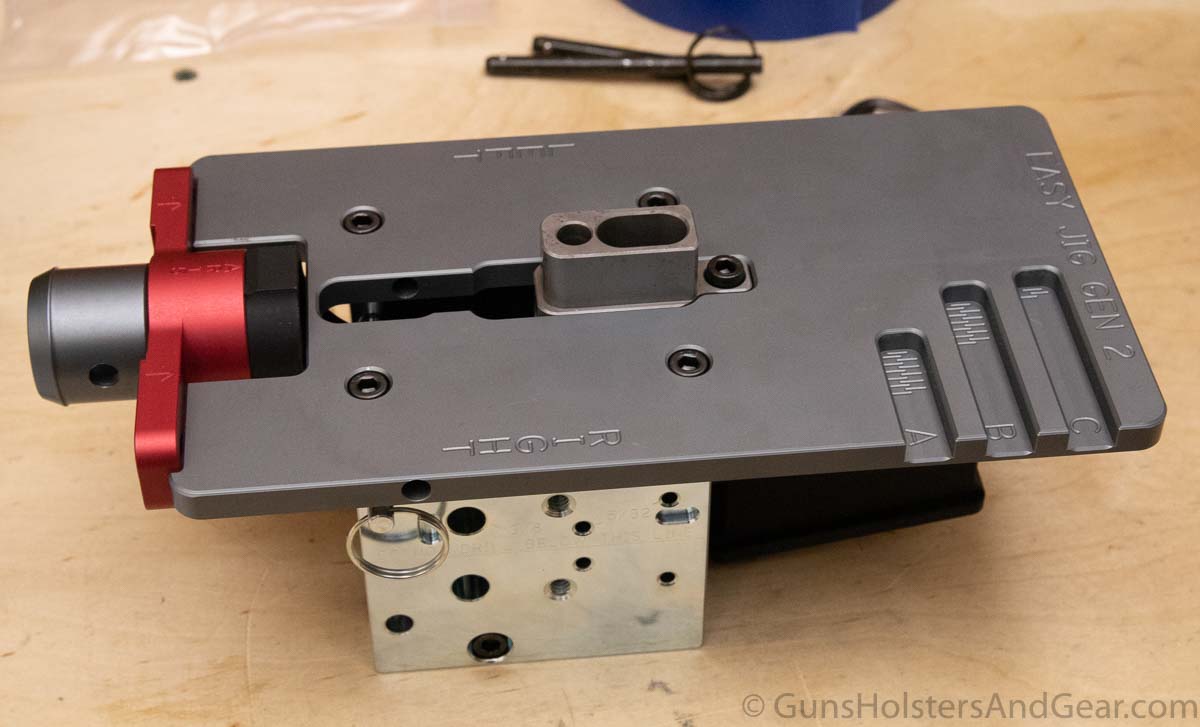
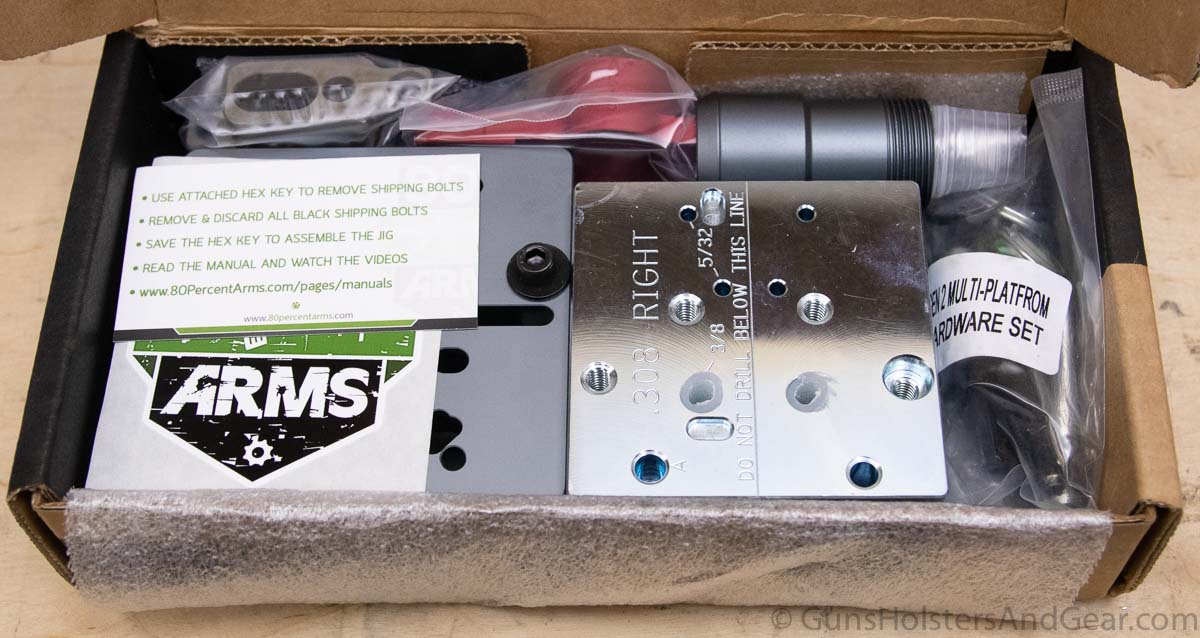
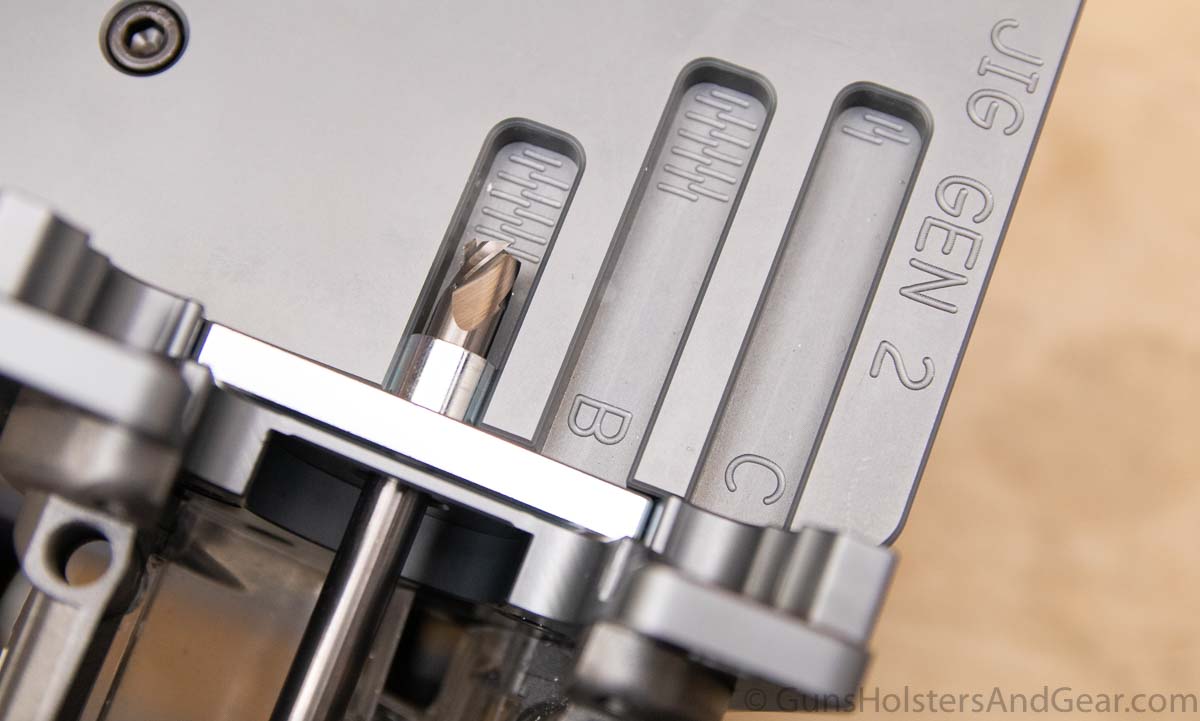
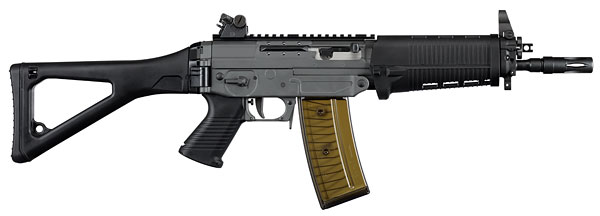
In this review, I tested the Easy Jig Gen 2 Multi-Platform that helps you make a wide range of firearms based on the AR15 lower and DPMS Gen 1 .308 lower. If you have no interest in the DPMS-type lowers, you can get the standard Easy Jig Gen 2 that will handle “all known AR-15, AR-9, and AR-45 designs” including those “exotic billet lower designs.”
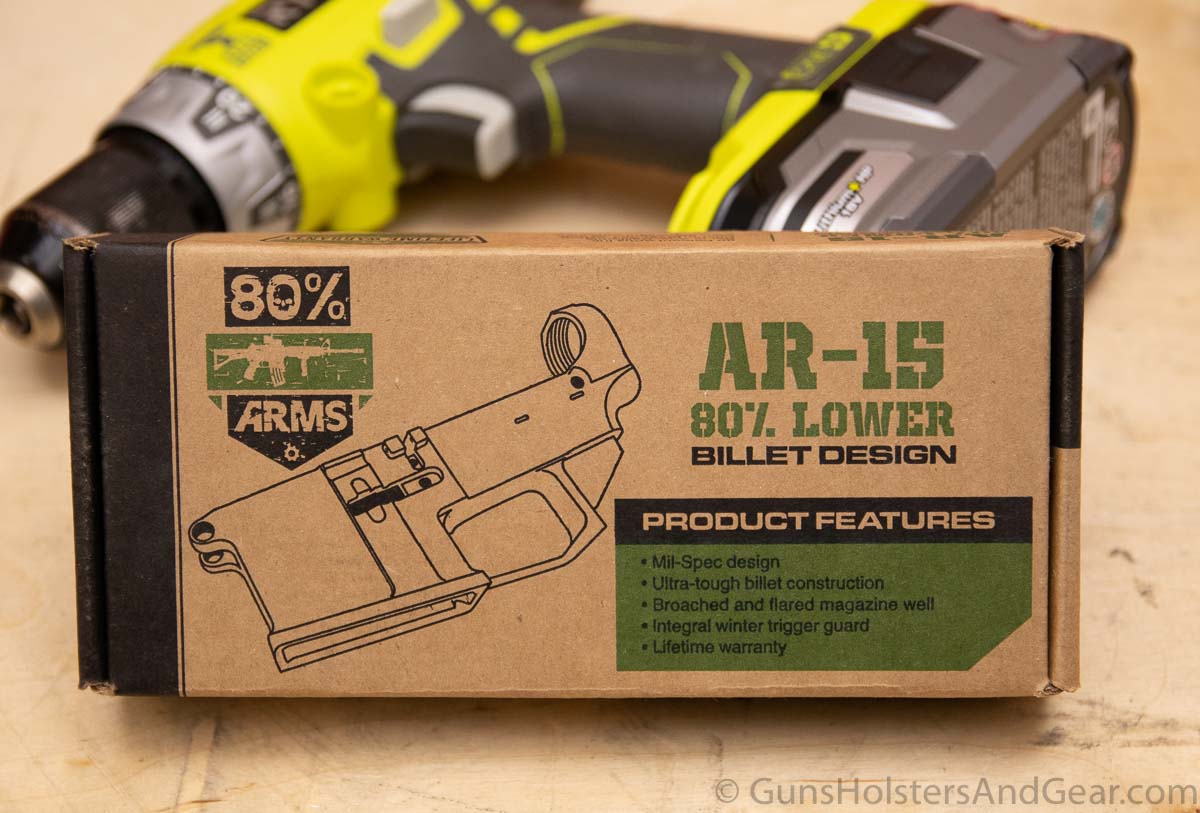
In this review, I put them to the test and machined a total of three lowers from different manufacturers. One was a billet 6061 lower from 80% Arms, one was a forged 7075-T6 lower from Anderson Manufacturing and the third was a polymer lower from EP Armory.
All of the lowers machined perfectly in the Easy Jig. Fitting them to the jig was simple and all of the milling and drilling was perfect.
(There was one error that resulted in a small chip at the top of one of the Anderson lowers. But, that had nothing to do with the jig. Rather, I failed to lock the router end mill depth. When I went to make a cut, the router jumped and caused the damage. Again, this was my failure and had nothing to do with the jig at all.)
Scroll down to see how well each turned out.
Fast to Use
Setting up the jig the first time is quick. Just make sure you follow the instruction manual, and you will be up and running in no time.
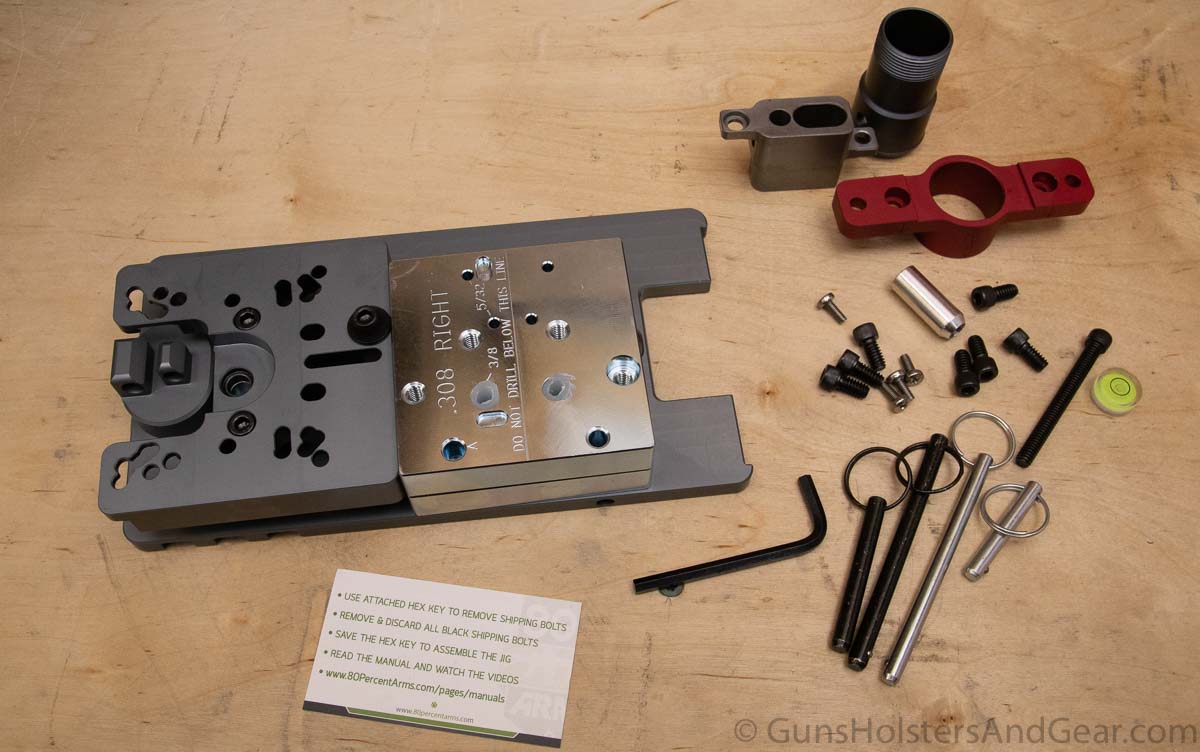
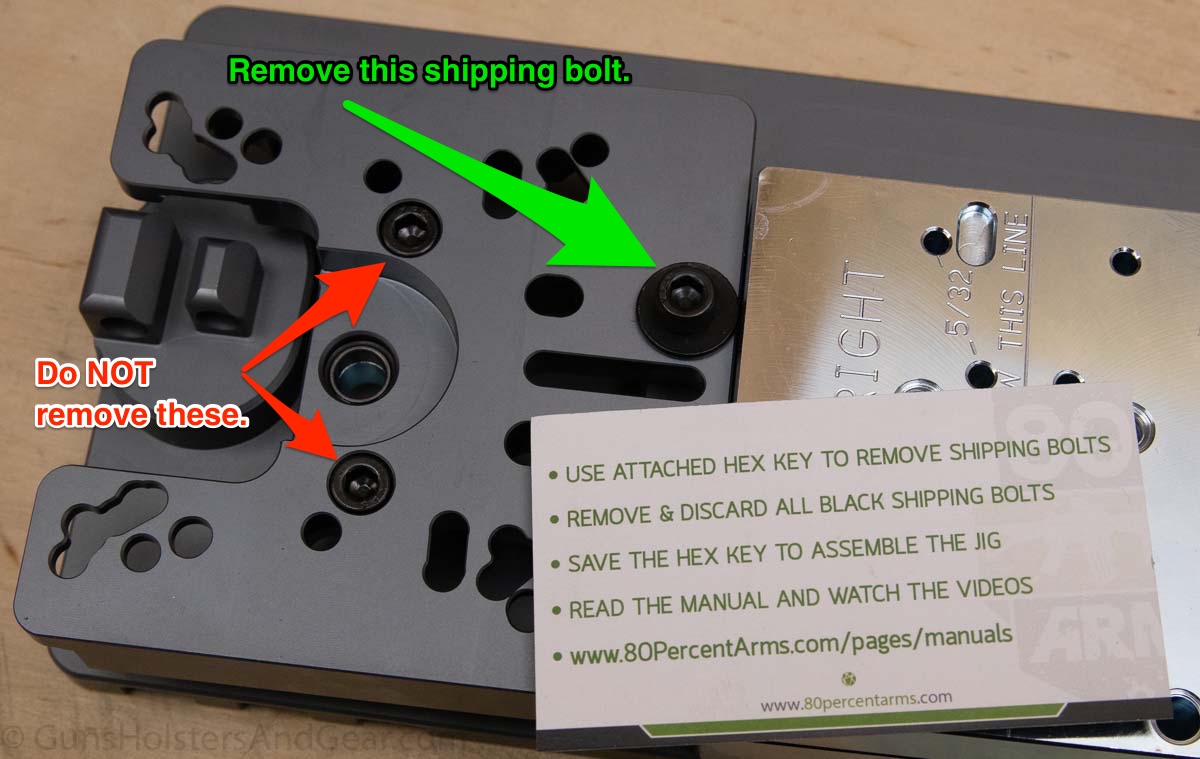
When the jig arrives, it is efficiently packed in a small box. For protection during shipping, some of the parts are bolted together. You will need to use the included hex key to remove the shipping bolts.
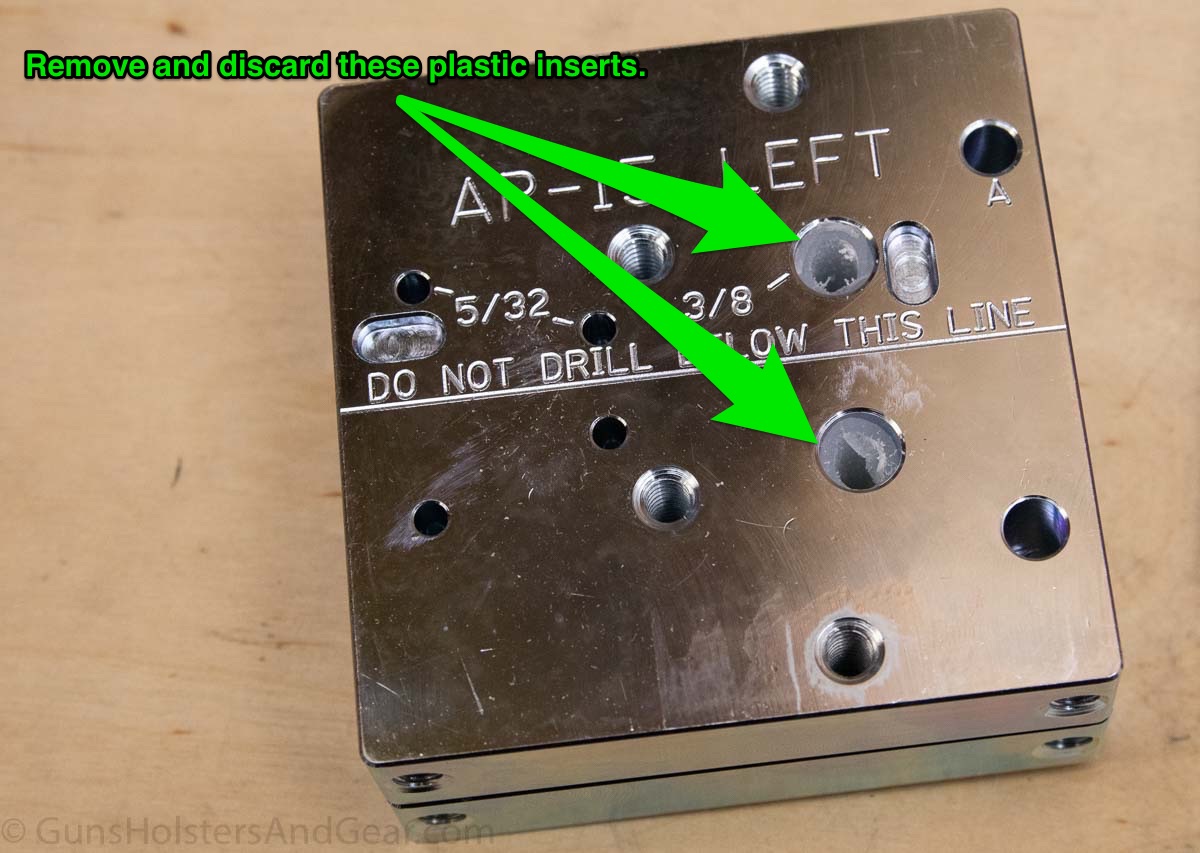
Additionally, there are soft plastic inserts that hold the side plates of the jig together. These pull straight out with a pair of pliers. I did not see a specific mention of these inserts in the instruction manual, but their removal was obviously needed.
The following video does an excellent job of walking you through the process of setting up the jig and completing your first receiver.
What’s nice is that after you set it up the first time, you can easily drop in a new 80% lower and get right to drilling and milling in no time. I finished three receivers back to back in an afternoon and found the process simple and fast.
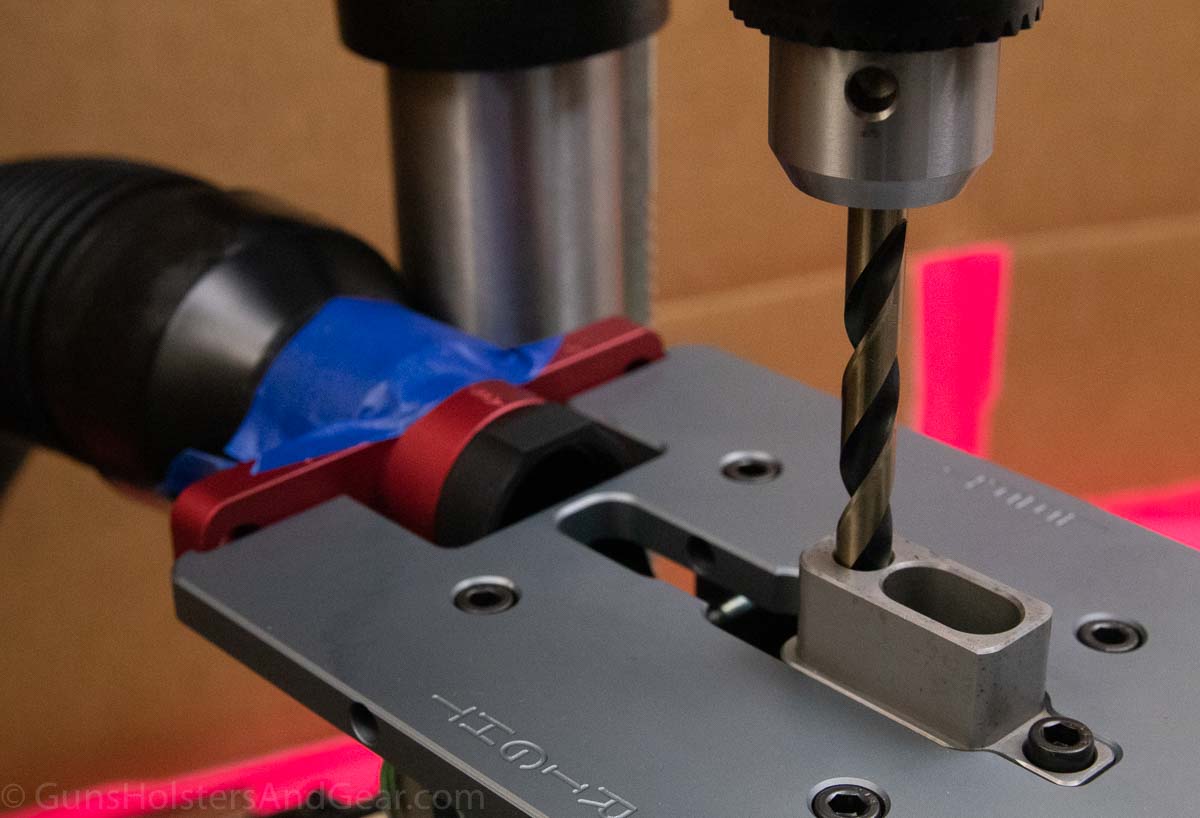
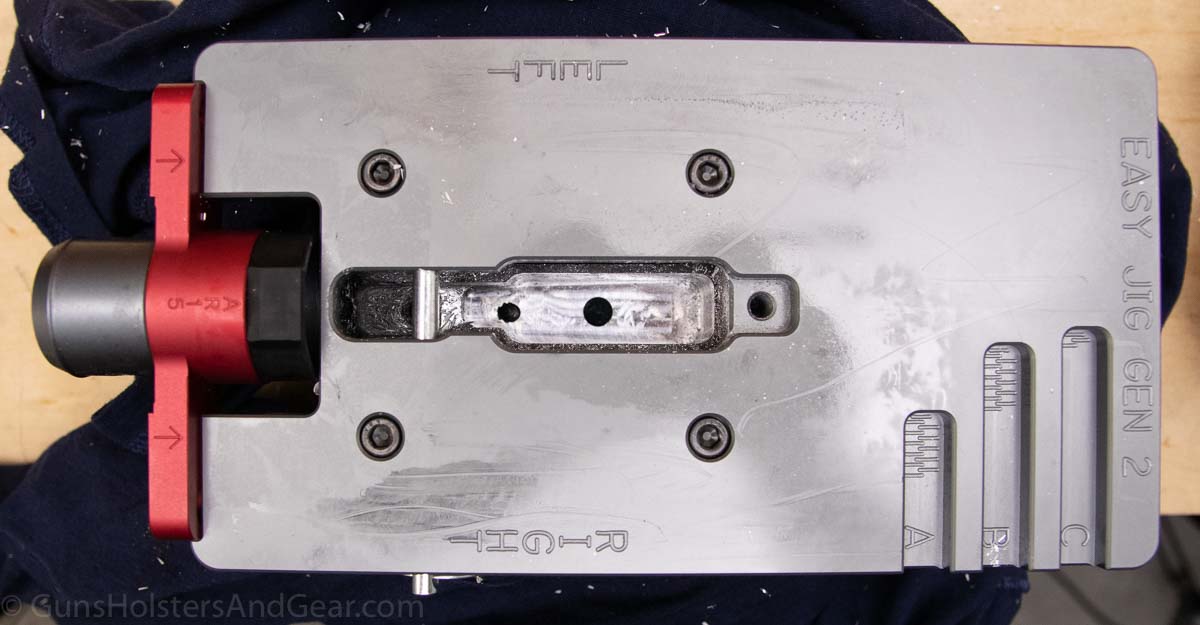
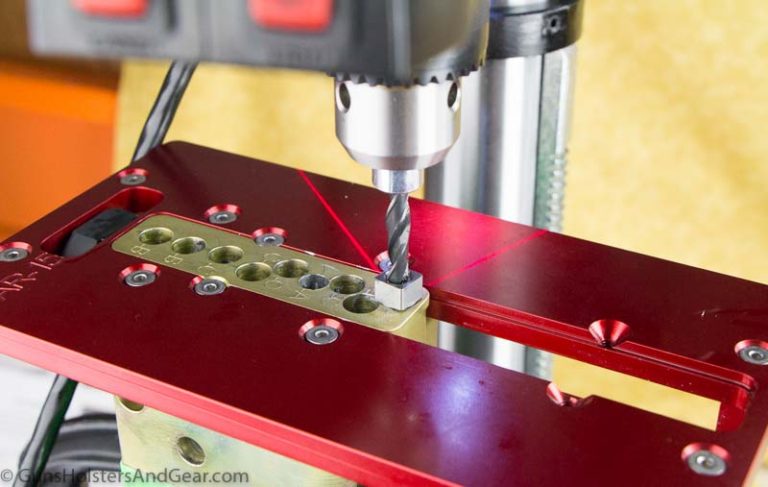
Unlike my other jigs, the Easy Jig Gen 2 requires only one hole to be drilled through the top of the receiver. Once this is done, the rest of the fire control pocket is cleared by the router alone. This saved me a substantial amount of time.
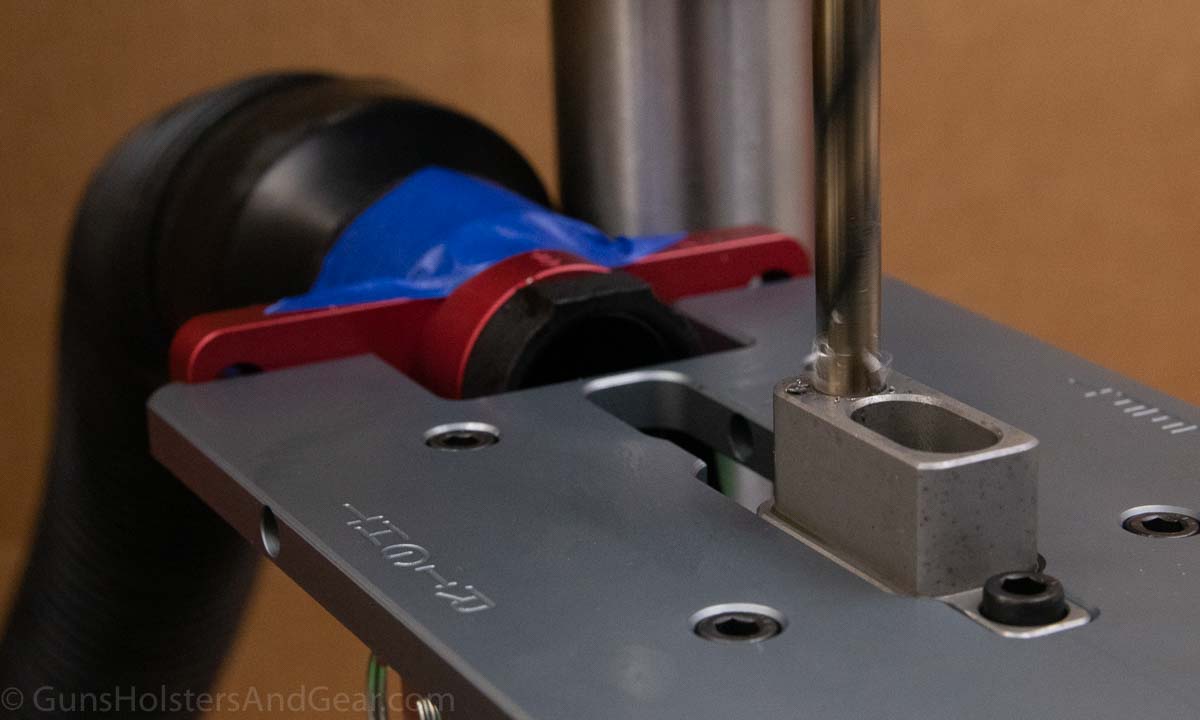
There is no need to measure anything when working the lower. You simply follow the jig outline and the pocket will be milled to the correct dimensions. To obtain the proper depth, there are built-in depth guides on the top plate. After each pass with the end mill, simply adjust the depth to the next hash mark as indicated in the depth guide. When you run out of hash marks – you’re all done.
Built into the design is the ability to attach a shop vac to suck away metal chips as you work. The buffer screw is hollow and is designed to mate with a 1.25″ shop vac hose. When you are working, keep the vacuum running to pull debris from your work area.
My shop vac has a 2.5″ hose. Stuck without a proper reducer, I simply used painter’s tape to seal the hose to the buffer screw. It worked fine, though I will buy a reducer before my next project.
Once the milling of the fire control pocket is complete, you drill six holes (three on each side of the receiver body) to complete the work.

At this point, you have a legal firearm. You still have to assemble the weapon with other parts to get a functioning gun, but the completed lower is considered a firearm for the purposes of federal law.
According to 80% Arms, a lower can be milled in 30 minutes. However, they recommend you take your time with the router to prevent damage and accelerated wear on the end mill. Many shallow passes result in a better-looking end product and increase the number of lowers you can complete with the same end mill.
I spoke with a company representative about end mill longevity. He advised that the average user will get about five lowers out of each end mill. However, if you take care of your end mill, you can machine 10 or more lowers with the same end mill. End mills aren’t cheap (about $40,) so take your time if you want to make your investment stretch.
Finished Examples
As I stated earlier, I completed three different AR lowers. One was a machined 6061 from 80% Arms, one was a forged 7075-T6 from Anderson Manufacturing and the third was a polymer lower from EP Armory.
The 80% Arms jig worked perfectly with all of them. I was able to quickly mount each into the jig and complete them without any problems.
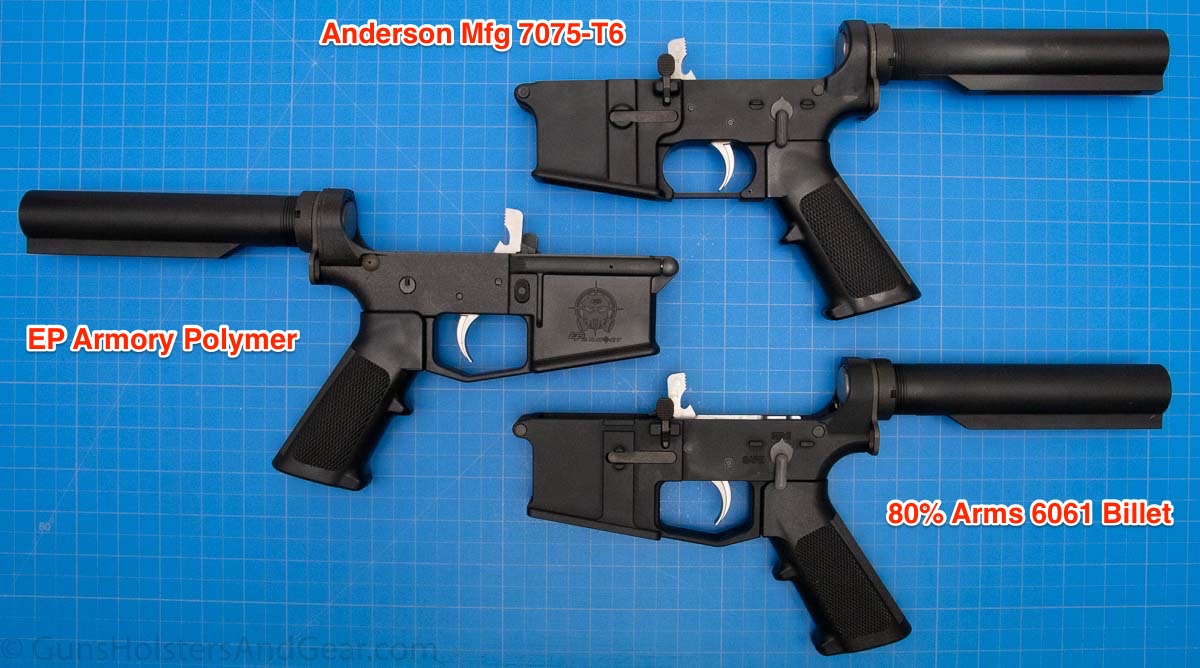
After completing the lowers, I installed an Anderson Manufacturing lower parts kit into each to ensure all of the holes and cuts were properly sized and placed.
Everything fit perfectly. All of the cuts the jig facilitated were perfect. Additionally, the lowers fit factory AR-15 rifle uppers from Rock River Arms. Springfield Armory and Aero Precision.
(Note that I did experience a problem with the bolt catch installation in the EP Armory, but that was a problem that appears to be with the receiver. No part of the bolt catch assembly involves anything the 80% Arms jig is responsible for. I’ll have more on that receiver in a future review.)
Tools and Parts Needed
As you might expect, you will need a number of tools and other parts to complete an 80% lower with the Easy Jig Gen 2.
Each of these items is listed below along with an explanation (if needed.) You can also download my checklist here. This is something you can print and take with you to Home Depot or Lowes.
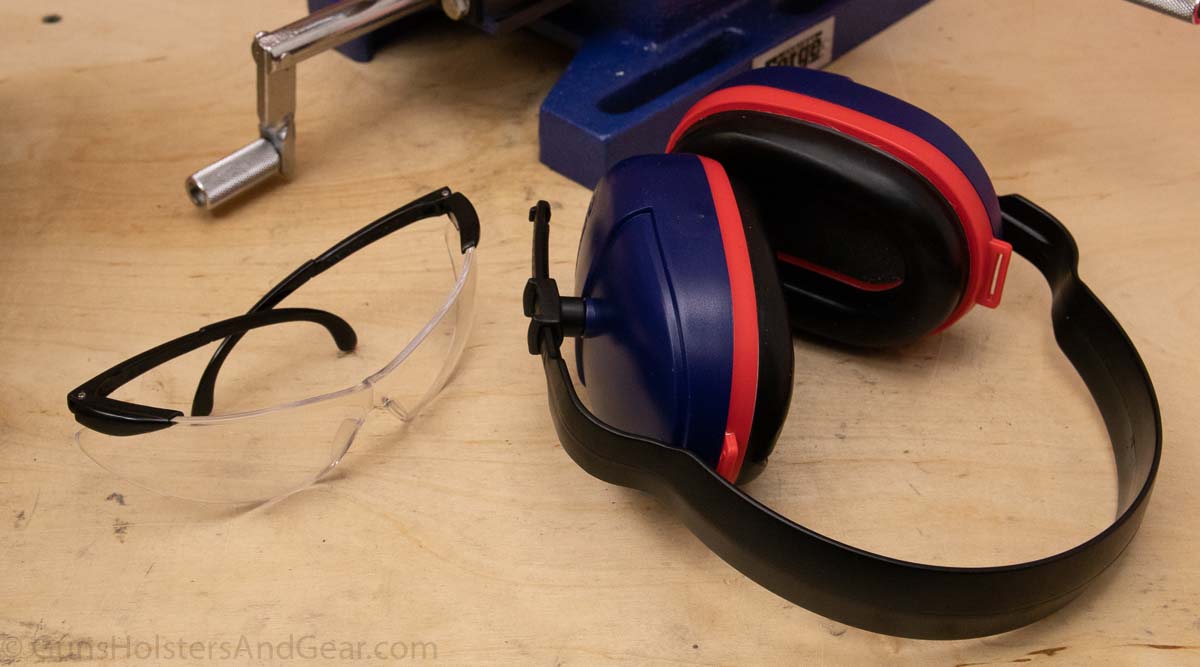
Eye and Ear Pro: You’re drilling and milling. Wear quality eye protection and a set of ear muffs. The eye pro should be obvious. If you don’t have some, get some. I wear these Allen Company safety glasses as they fit over my prescription glasses, never fog and are inexpensive.
Hearing protection might be skipped by a lot of folks, but you’re working with a router and shop vac that combine for a lot of noise – especially if you are in an enclosed garage. I measured 105.1 dBA as an average noise level at my head when running both. A standard pair of muffs can attenuate that by 24-30 dB.
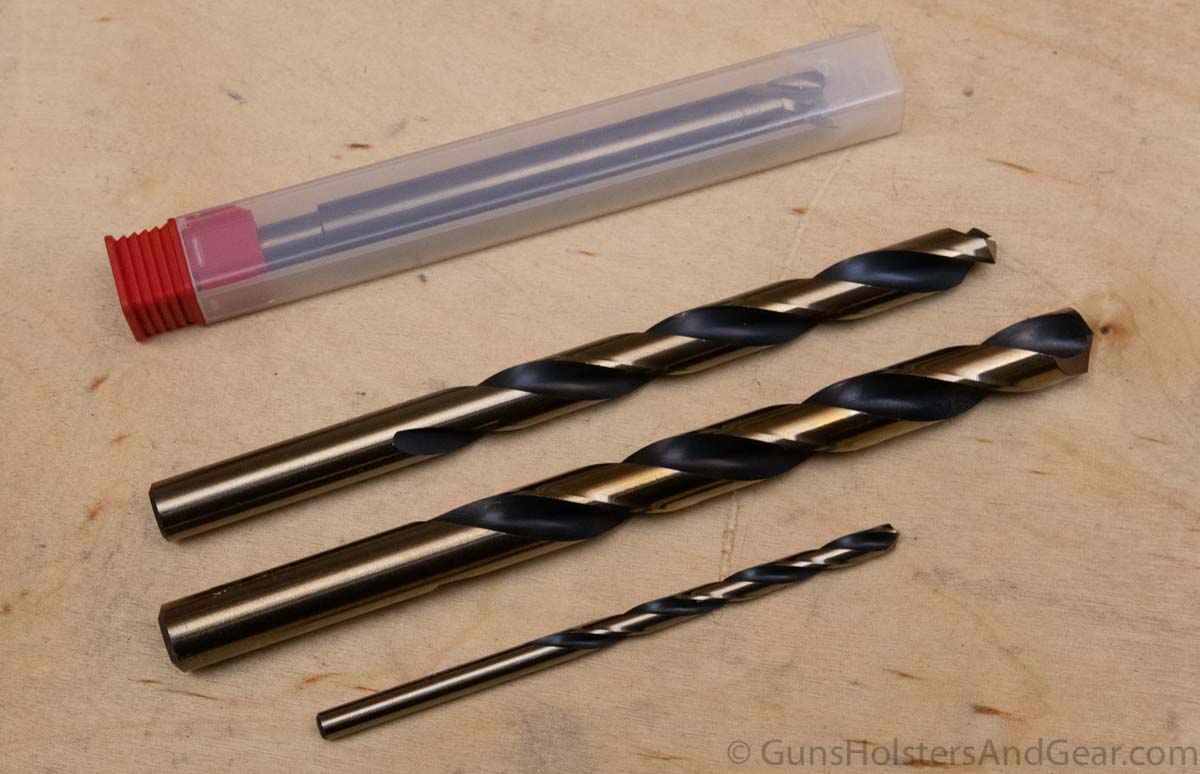
Easy Jig Gen 2 Tool Kit: You will need three drill bits and a carbide end mill to do the machine work necessary on the 80% lower. 80% Arms offers a kit that contains all of these for $49.99. It is likely the drill bits will last you for scores, if not hundreds, of lowers if you take care of them.
The end mill does most of the work and ends up getting the majority of the wear. It is the most likely to be damaged due to human error. These can be purchased individually for $39.99.
Drill or Drill Press: Let me be crystal clear: 80% Arms does NOT recommend the use of a cordless drill. Instead, the company suggests the use of a drill press or a corded hand drill.
Nevertheless, I spoke with someone who stated a quality cordless drill will give good results. I will test this in a future article.
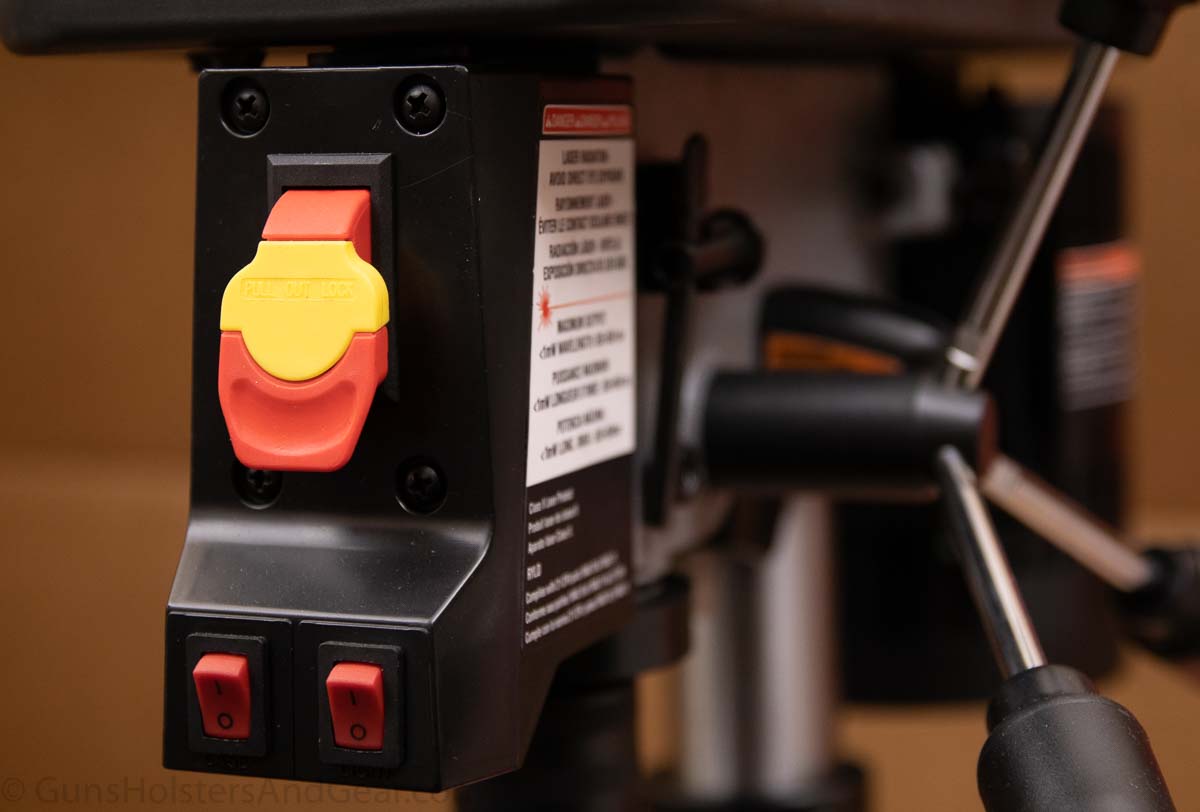
I use an inexpensive Ryobi DP103L 1/4 HP drill press that I purchased at Home Depot. They run about $170 when I’m writing this. If you don’t have a Home Depot near you, they can ship it, or you can grab it at Amazon.
As an alternative, the WEN 4208 gets good reviews on Amazon, including feedback from several people who are using it specifically for making AR15. Although it isn’t quite as nice as the Ryobi, it is about half the price.
Router: For me, the router choice is easy: the Rigid R2401. This is a variable speed, corded laminate trim router that works perfectly for milling lowers. I’ve used the same router with different jigs and it performs superbly with each.
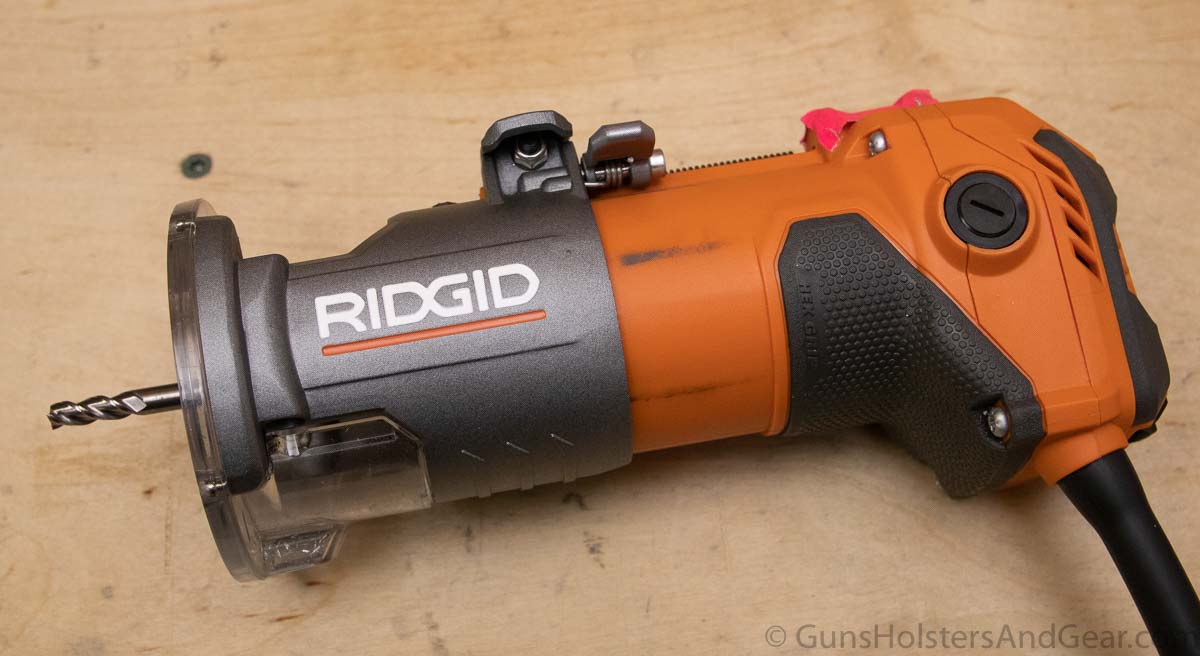
Don’t like Rigid tools? No worries, 80% Arms has a complete router compatibility list here.
One thing to be aware of: you will need to replace the router base with a new plate that comes with the Easy Jig Gen 2. The Rigid R2401 mates perfectly to the new plate. The others may have special needs. Just check the list before buying.
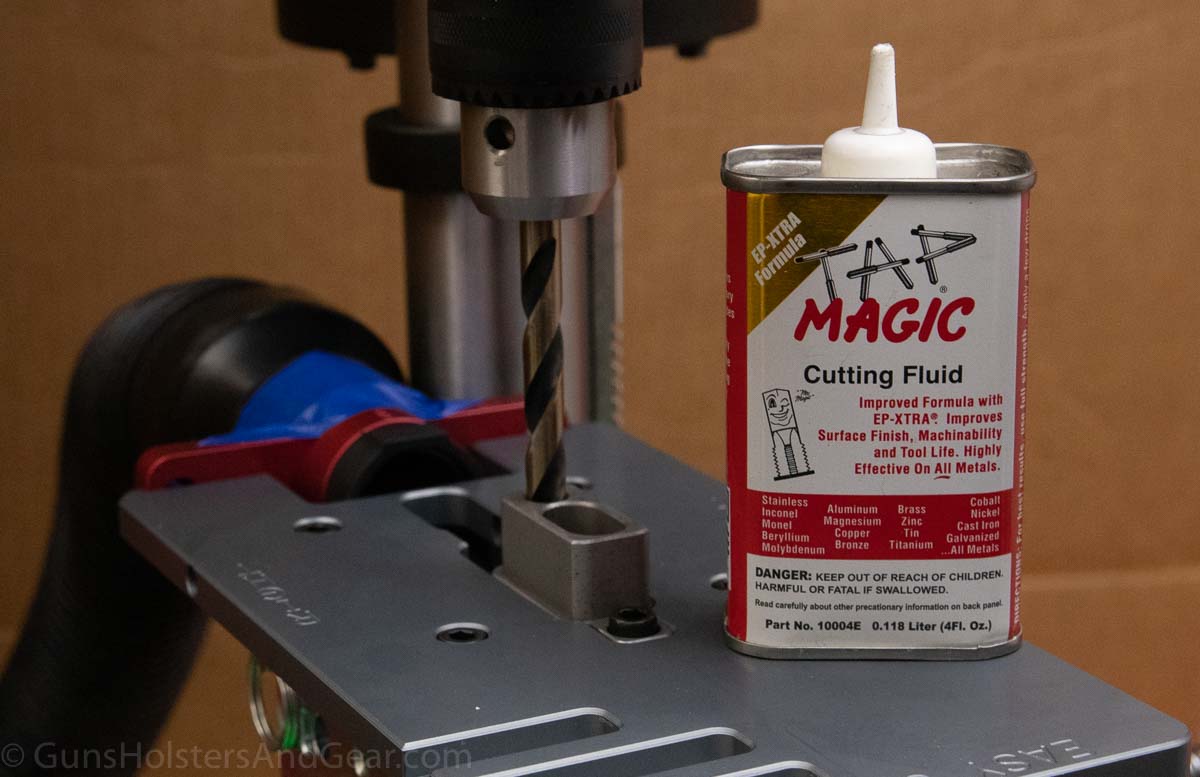
Cutting Fluid: When cutting metal, it is a good idea to have a cutting fluid or another thin lubricant. Some folks like to use WD40, but I choose to use Tap Magic. It was recommended to me years ago, and it seems to work very well. A little goes a long way; I’m still on my original can.
Needle Files: A simple set of needle files is useful for cleaning up any burrs inside the fire control pocket. Sometimes you will get a little rough spot from drilling your pin holes. The needle files can quickly clean those up.
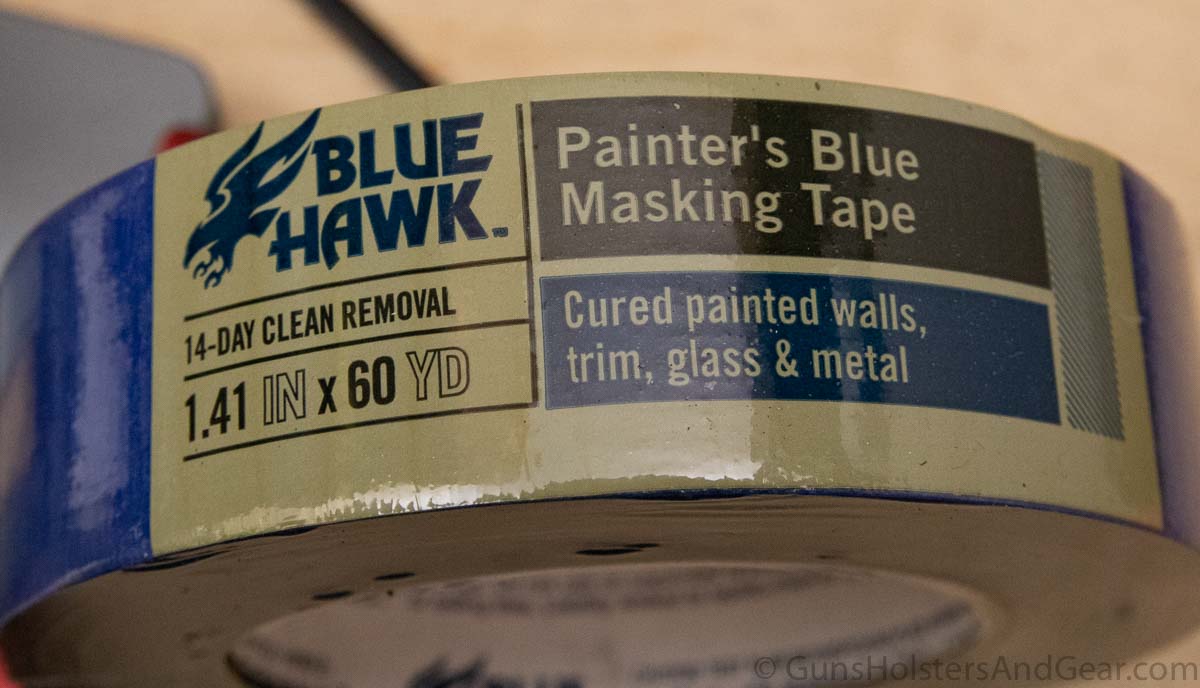
Painter’s Tape: The center alignment bar may need 1-3 strips of painter’s tape to snug the lower into the jig. Additionally, I like to use tape on the vise to prevent marring of the jig. The tape can also protect the finish of your lower when installing parts into the finished lower.
Simple Green: Assuming you use a lubricant when milling the lower, you will want to use a degreaser to clean things up before assembling your new rifle. Simple Green is my favorite cleaner to use. I’ve been using it when working on cars for decades. It works equally well on gun parts. Bonus: it’s non-toxic and won’t strip flesh from your hands.
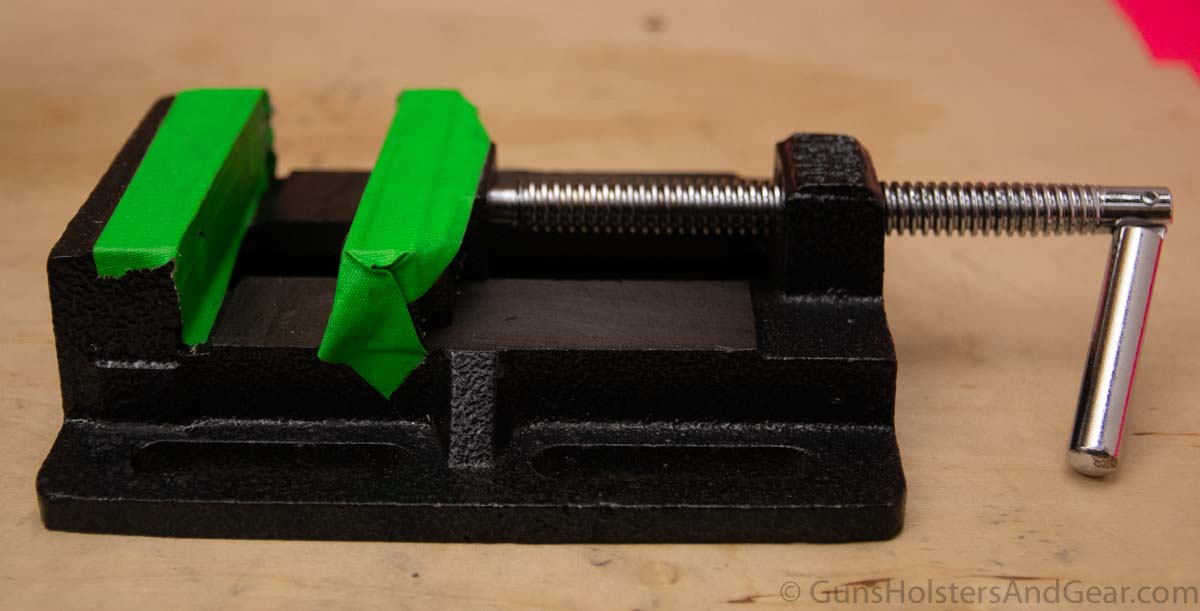
Vise: You don’t need anything fancy. I use a very simple vise like this Irwin Tools drill press vise. Since my garage bench space is limited, I use C-clamps to lock it down and it works great.
Bonus: Using this small vise allows me to carry it to my office desk where I use it when installing parts in the newly minted AR lower.
Legality
Many people ask me:
Is it legal to build my own gun?
There’s a good chance you already know this, but it is completely legal under federal law to make your own firearm without a license or other paperwork.
State laws vary, but it is legal in most jurisdictions for you to build your own gun without government oversight. However, it is important that you check your local laws to make sure you don’t run afoul of any regulations. You may also want to read my article Am I Required to Apply a Serial Number to a Homemade Firearm?
I cover a lot of the legal ground on homemade firearms in that article.
Final Thoughts
I believe that every shooting enthusiast should take the time to build his or her own firearm. An AR is a great place to start on this journey, and the 80% Arms Easy Jig Gen 2 makes the process as easy as you could hope for.
Assuming you do not rush through any part of the milling process, the Easy Jig Gen 2 makes completing an 80% lower dead simple. You can crank out several lowers in an afternoon if you want.
I’ve used other AR jigs, and this one is my new favorite. I recommend it without any hesitation.
Disclosure
I disclose all relevant information that may impact how I review a piece of gear. I wish all sites did this.
The Easy Jig Gen 2 was provided to me by 80% Arms specifically for review. The company did not ask for any special treatment nor was any offered. One of the lowers used in this article was also provided by the company. All of the tools and other lowers were purchased with my own money.
80% Arms is not a sponsor or advertiser of this site, nor were any monies offered or accepted for the writing of this review. I have no financial interest in 80% Arms or any other company in the gun industry.
GunsHolstersAndGear.com is a for-profit website. I do not charge readers a dime to access the information I provide.
Some of the links on this page and site are affiliate links to companies like Amazon and Palmetto State Armory. These links take you to the products mentioned in the article. Should you decide to purchase something from one of those companies, I make a small commission.
The links do not change your purchase price. I do not get to see what any individual purchases.
Questions about this review or comments about the jig? Please leave them in the comments section below. I just ask that everything remain civil and free of profanity. I’m running a family-friendly site and want everyone to be able to get good information here.


I’ve got an older Modulus. It works, but it is very slow due to all of the pilot holes I have to drill. This looks so much better! The video makes it look super easy. Awesome photos too! Thanks
Hi Kyle,
You are very welcome. I really like this jig. There’s nothing wrong with the Modulus, and I have one myself. But the 80% Arms jig is so much faster and easier to use. If you decide to get one, let us know how it works for you!
-Richard
Drilling just the one hole on the top is such a time saver! I see I’m not supposed to use a cordless drill, but if I have a 20v Dewalt, do you figure that would be ok? I’m sure they recommend against cordless drills just because of the cheap 12v ones on the market.
Hi Hugh,
Yes the single pilot hole is a huge time saver. I suspect that the 20v cordless would work. The side holes should be easy since they are not terribly thick. The pilot hole might be a bit harder, but just use a medium speed and pull out multiple times to clear the chips. You should be fine. The company even has special guides for hand drills if you want an increased level of precision.
-Richard
I tried using that sticker that EP Armry includes with their lowers. It was…not good. I had to do a lot of hand finishing to get the thing within spec. I’ll try using this jig for my next lower (an 80% from Thuinder.)
Hi Terry,
I never had the courage to try the EP sticker “jig”. The 80% Arms Easy Jig Gen 2 worked easily enough with those lowers so you should be set.
-Richard
This is an awesome jig. I purchased one a couple of weeks ago and have milled two of the company’s 80% lowers on it. Both turned out perfect. Super easy to use. Highly recommend!
Routers are nice, but have you tried using a milling/drill press setup? I completed my first forged lower using a drill press jig recently and was able to to do plunge cuts with light milling to polish the interior walls and floor of the FG cavity.
Hi Terrell,
Yes, I’ve used a similar set up in the first generation Modulus Arms jig. It works well but is much slower than the 80% Arms Easy Jig Gen2. However, I’ve avoided using a drill press as a mill because of the potential safety problems. I’d rather just use the router and ensure I don’t do damage to my press or lose an eye, etc. I know a lot of people have used a drill press as a mill successfully, but I don’t see that the value outweighs the potential danger. I hope that makes sense.
-Richard
Can you confirm that the Gen 2 will work on the AR9 platform? I’ve done both the AR15 and AR10‘S but haven’t attempted the AR9 as of yet.
According to the company, yes – it will do AR9-type lowers. I have not independently tested that, but the company gave me no cause to question it. I hope that helps!
-Richard